
Once the SSO configuration is done, you need to perform the group mapping as well, i.e., map the group already existing inside the IDP with the respective group of ARC Facilities.
Upon SSO configuration completion, Navigate to Account Group section from the “Account Settings” and create the respective group name inside the application.
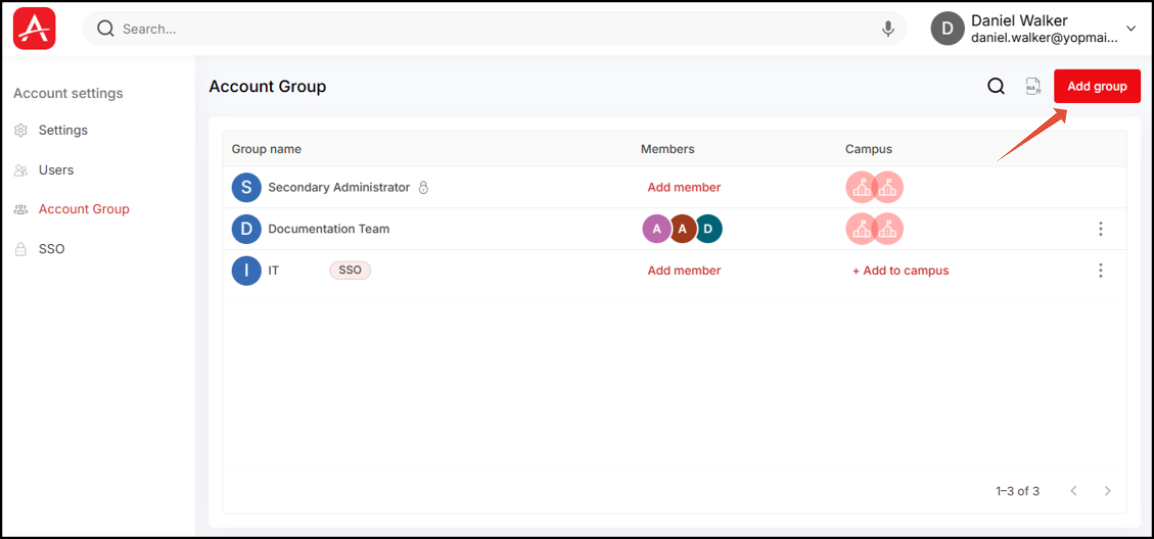
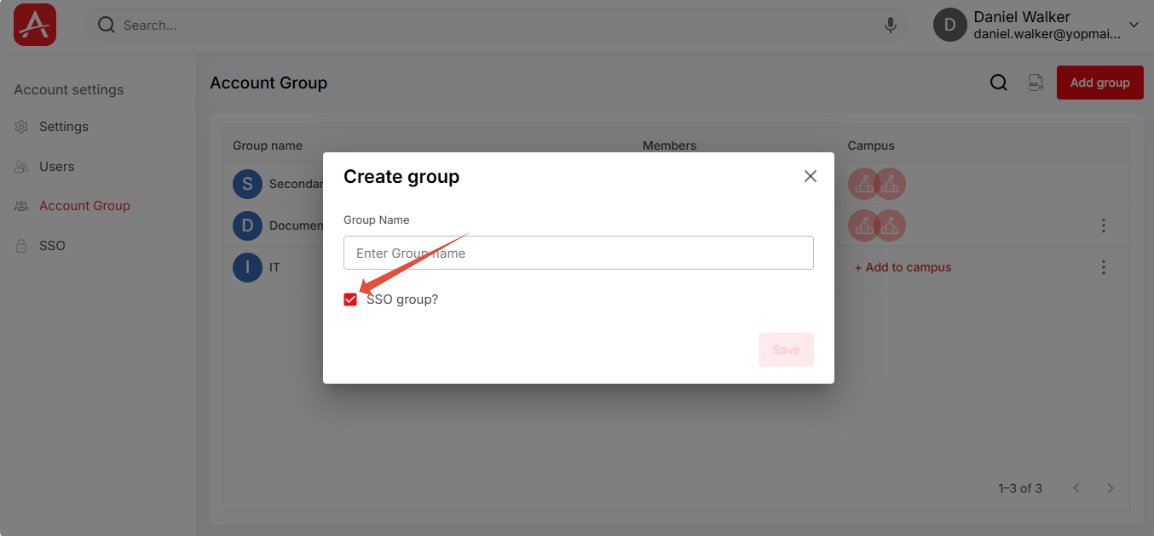
NOTE: WHILE CREATING THE GROUP SELECT THE SSO GROUP CHECKBOX PRESENT BELOW THE “GROUP NAME” BLANK BOX.
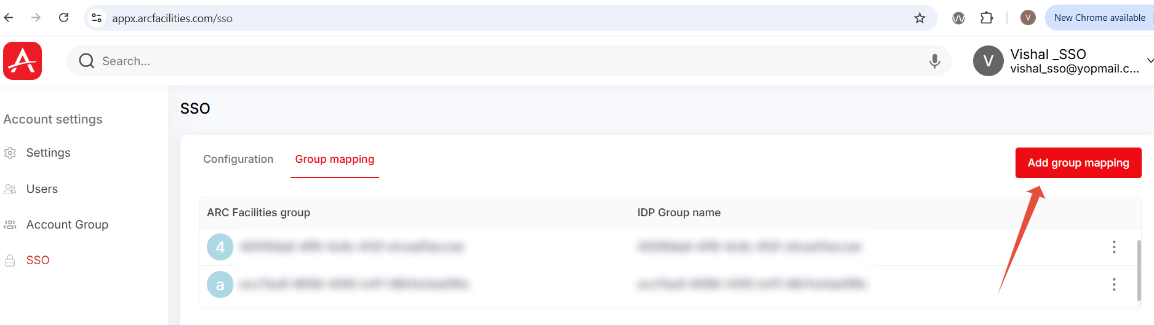
After the group is created, navigate to the ‘Group Mapping’ tab from the SSO section from “Account Settings”. Once navigated, as the SSO configuration is completed, the [Add group mapping] button will be enabled in the top right corner of the screen.
- Click [Add group mapping] button, a small window to select both the groups will appear.
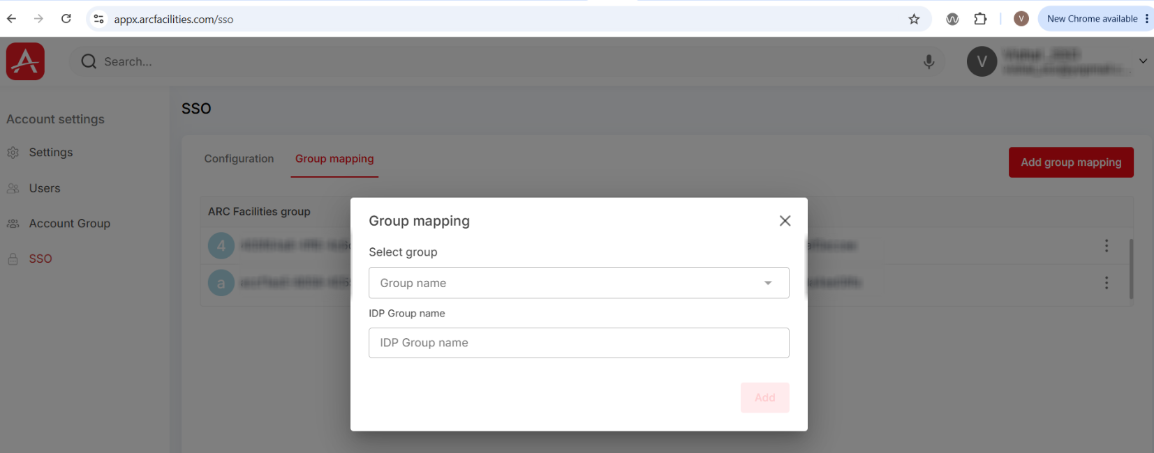
Select the newly created group name of the application from the drop-down menu and enter the IDP group name next. Once done [Add] button will be enabled. Click on [Add] button to add the group mapping.
If added, the group mapping will be done successfully. This will result in reflecting all the members present inside the IDP group inside the application SSO group also.
Now, if we associate any campuses with the application SSO group those will be shared to the members present inside the group as well.