Through this widget, you can view the list of equipment inside the campus, view/add new equipment info, pin the location of an equipment on the specific floor plan of a particular building and then view the equipment details or info of an equipment.
The Equipment screen displays the list of equipment inside a campus. To find specific equipment, you need to search using search keyword or tags.
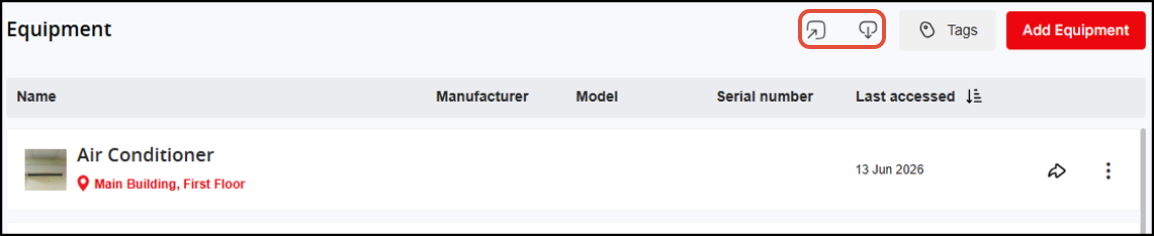
Screenshot below displays the list of equipment inside a campus: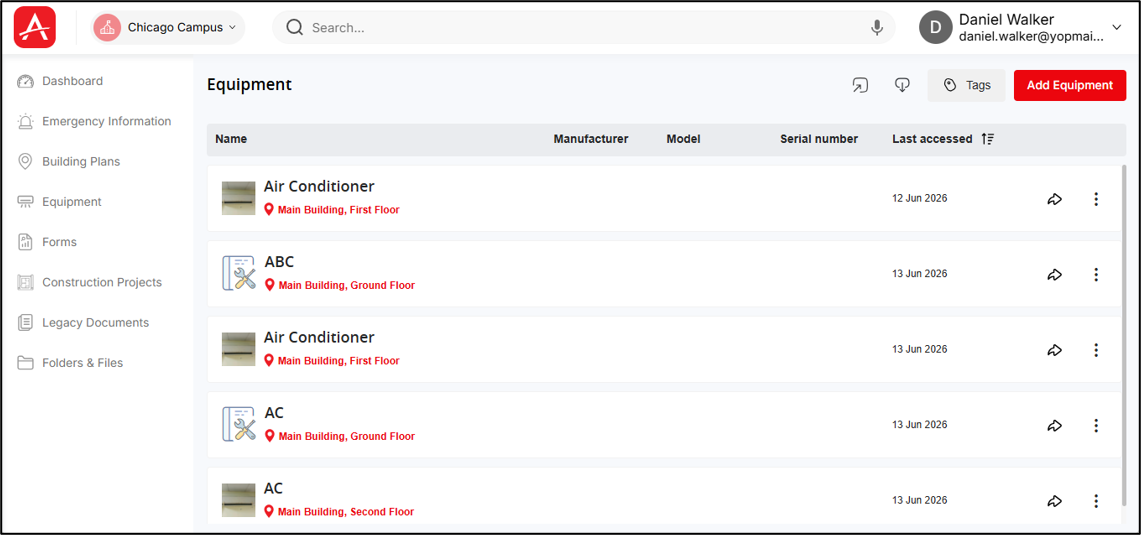
The Equipment screen displays the list of equipment inside a campus and the search tags at the top of the screen.
For each equipment, the Building, Floor, Area (this is the full location of the equipment shown as a link) where the equipment is located and the Serial No., Manufacturer name & Model No. is shown along with the last accessed date.
The last accessed date & time can be used to sort the equipment list.
Note: Only date will be shown for 'Last accessed' column in Equipment list screen (this date will be last accessed date and not the equipment modification date - based on this date the equipment will be sorted).
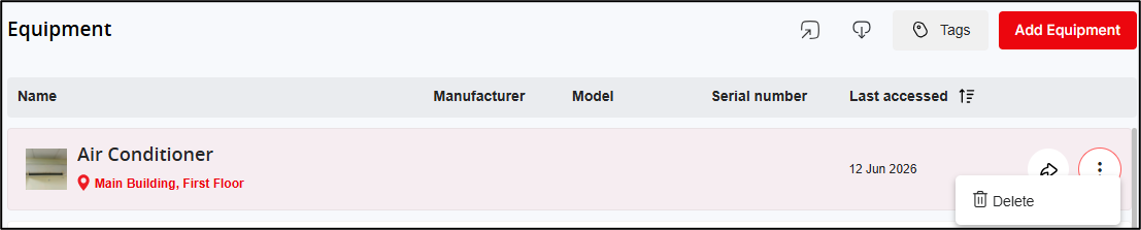
Upon clicking this location link the floor plan opens through the Viewer displaying the PIN which identifies the location of the equipment.
- Click
 button button to share the access link of the equipment to another user.

- Click the ‘More options' button to find the equipment ‘Delete’ option.
To find specific equipment, search using search keyword or tags.
- Click
 button to open the right-hand panel where all the search tags will be listed.
The tags are segregated into Building & Floor tags & Other tags. The system tags like Building name, Floor name etc. are created immediately and associated with all equipment which are created within the respective floors of the concerned Building. Whereas when you create the equipment, enter and associate custom tags with the Buildings they fall under the ‘Other tags’ section.
Screenshot below displays the list of search tags inside a campus:
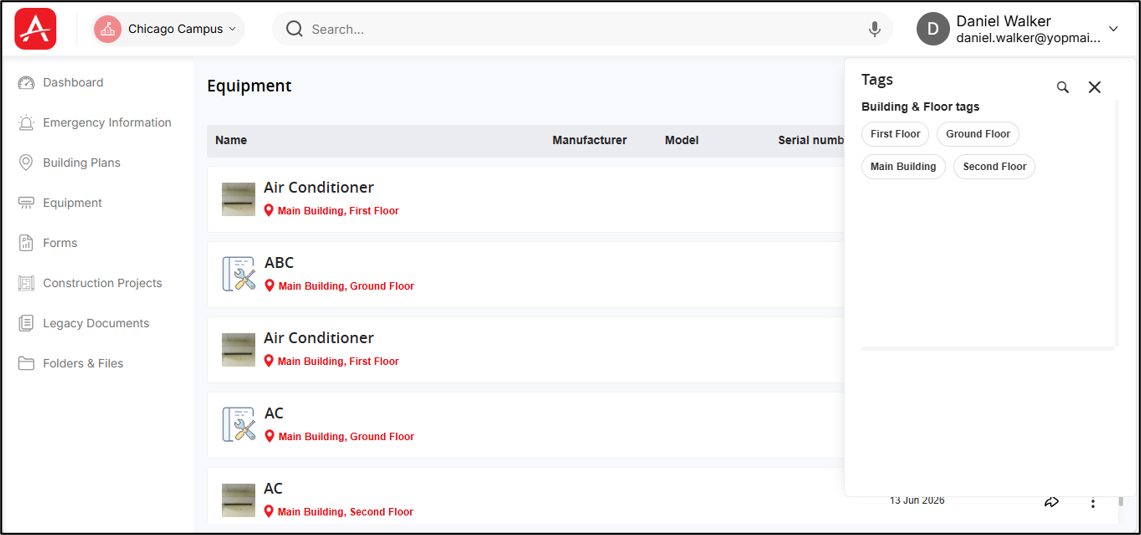
The equipment can be searchable using equipment name and other meta-data of the equipment. The right-panel of the screen displays tags associated with all the equipment of the campus. You can enter tags while uploading equipment. Hence, each tag is associated with one or more equipment. You can select one or more tags and search for equipment associated with the selected tags.
For example, when you click the AHU tag from the right panel which is associated with more than one equipment of that campus, then result shows only equipment associated with the specific AHU tag.
- Click on the equipment from the list to view or edit details of that equipment.
You can edit change/delete the equipment photo, modify equipment General details, Manufacturer/Model & Location. Also, you can view/remove/attach forms, view/download/attach supporting documents, view/edit parts information, view/edit links & remove/associate tags.
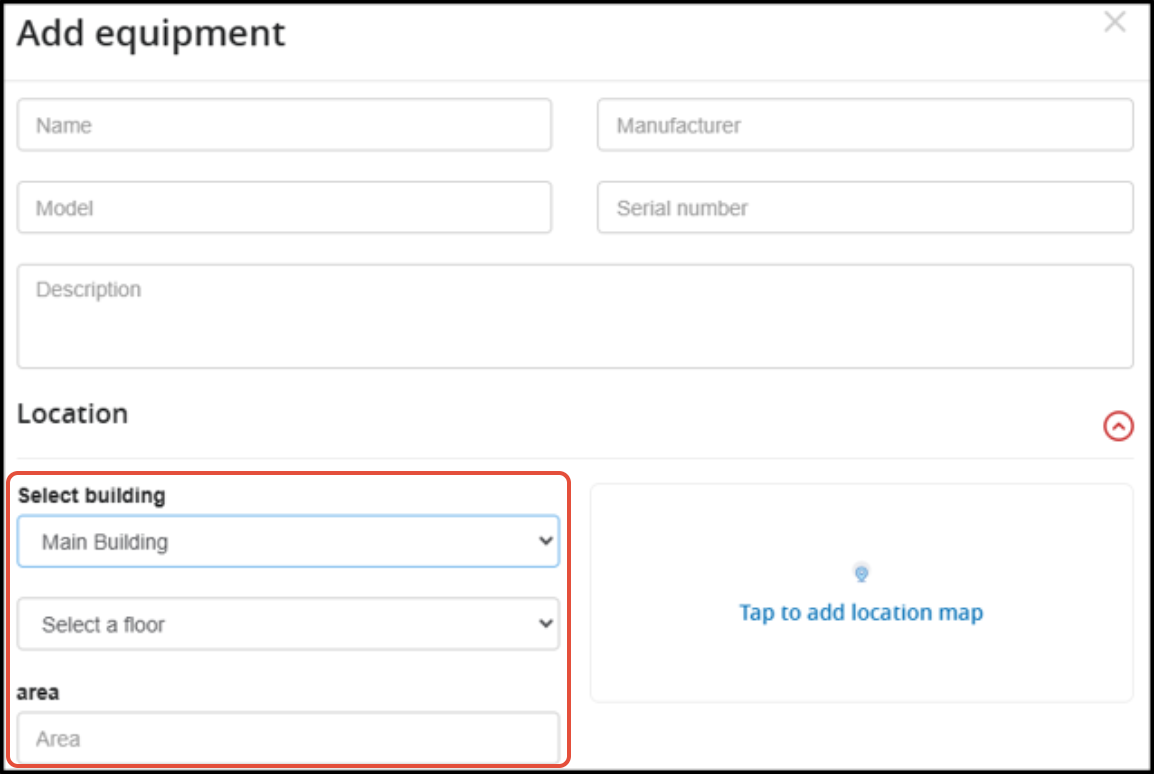
But when selecting Building location, there is option to select a Building and Floor under which the equipment is located and also enter the area on the floor plan where the equipment is located.
On Equipment list screen, upon clicking equipment, the details of that equipment displays in full screen.

Import & Export option:
There are options to import(upload) and
  export (download) a list of equipment in Excel or CSV format from local computer to the equipment list screen and vice versa.
Screenshot below displays the Export/Import functionality access buttons on the Equipment list screen:
Importing equipment
The bulk import screen appears after you click the [Import] button where user can upload a CSV or excel file from local computer and map the columns in the file with equipment fields in the application.
Equipment import will fail if there is no Building, Floor in campus.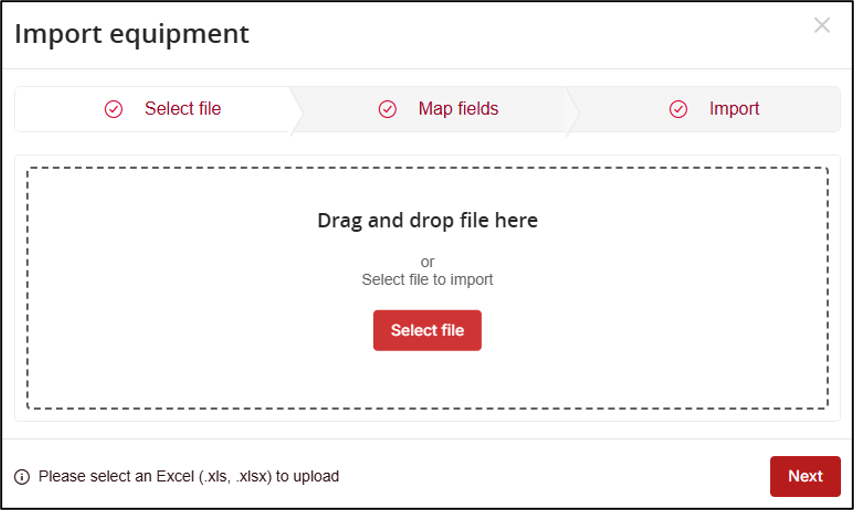
Equipment import mapping will be based on Asset ID to determine whether the equipment exists in system or not. Otherwise, the equipment will be considered as new equipment.
Fresh equipment import & update (export, update CSV & then import) of existing equipment will be done through import functionality.
Screenshot below displays a file selected in this screen

After file selection, click the [Start mapping] button on the screen to map the excel columns with the equipment fields in the application.
Open the drop-down beside each excel column header and select the appropriate field.
After mapping of appropriate columns with appropriate fields is completed, click the [Start import] button to view the import status.
Application will display the mapped data which is present in the excel sheet.
Now click the [Save] button to complete uploading importing the equipment data.

In the end, click the [Done] button to close the import popup window and view the freshly imported equipment on the Equipment list screen.